
-RATED BY


Built in Canada
All Ecoline windows and doors are built in Ontario, Canada
- Top-of-the-line machinery (Forel, Gracco, Bottero) to produce the best products
- Over 60,000 sq. ft manufacturing plant
- Energy Star-rated and NAFS-11-tested
- Manufactured for local weather conditions
How to Add a Window Opening To Your House: Installation Guide
Dec 1, 2025
12 min read
4953
We all love seeing natural light streaming in through our home’s newly washed windows.
And that comfortable feeling we get as the morning sunlight filters through the window blinds and warms the room.
But what if your place is dark and uninviting with only a few small openings to brighten the living spaces? Are you destined to live in the shadows or is there something else you can do?
It is absolutely possible to add a window or two to your house, but like every home improvement project, there are crucial steps you’ll need to follow.
Step 1 – Research
- Find out the local Building Code requirements for adding a new window. Check with an engineer or building inspector in your town to find out what permits may be required and any specific regulations for size and installation methods. You will likely need to supply framing plans and coordinate on-site inspections. These will require the area to remain open (without flashing or siding) until the inspector has examined and approved the work.
- Identify the general area where you’d like to add the window. Take into account how it will look from the interior and exterior. It should complement the home’s exterior aesthetically and work with the other window styles. From the inside, consider furniture placement, room balance and wall position. Keep in mind sun exposure and weather direction to make the best use of natural light and reduce heat gain/loss.
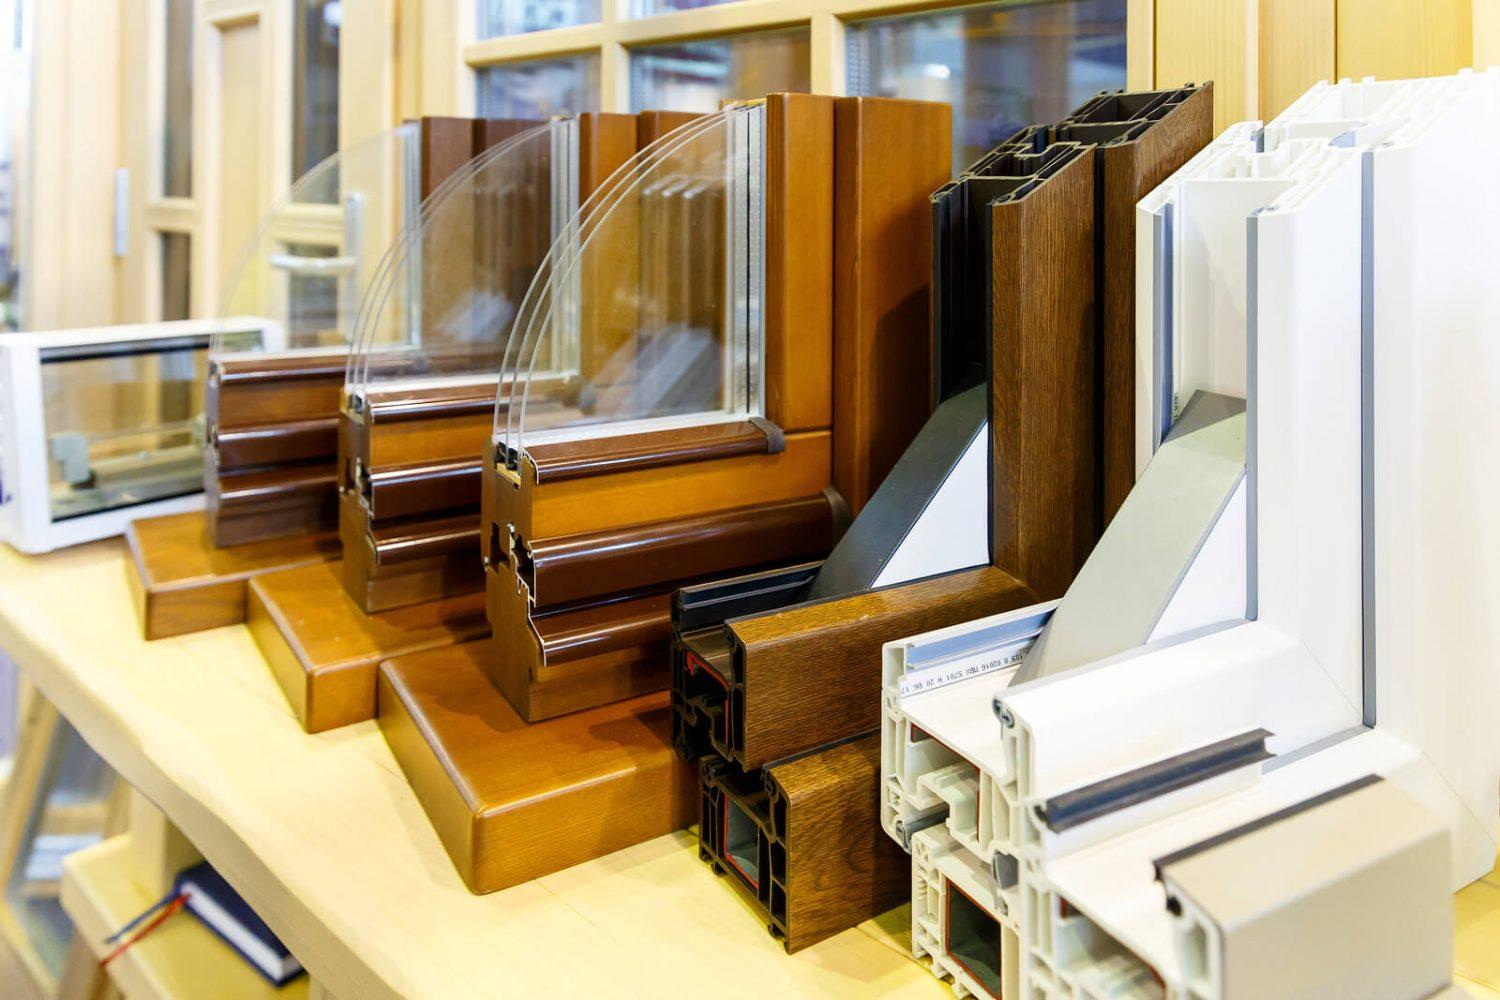
- Determine what type of window you’d like to install. There are a variety of styles to choose from including double-hung, casement, awning, Low-E, double-pane, triple-pane, argon gas-filled, metal, wood, vinyl and flanged windows. Deciding on the right window style will ensure that each part of a window will complement your house design and aesthetics.
- You’ll also need to avoid electrical wiring, plumbing and ductwork, so you should do a little investigative work to locate those items before you start your project. If any of these components run through the area where the window will be, you may need a professional electrician, plumber or HVAC technician to move them. In some cases, you may need to find a new location for the window if they can’t be moved.
Step 2 – Purchase Materials/Rent Tools
If you’re ready to tackle the project yourself, these are the materials and tools you’ll need in addition to the window itself:
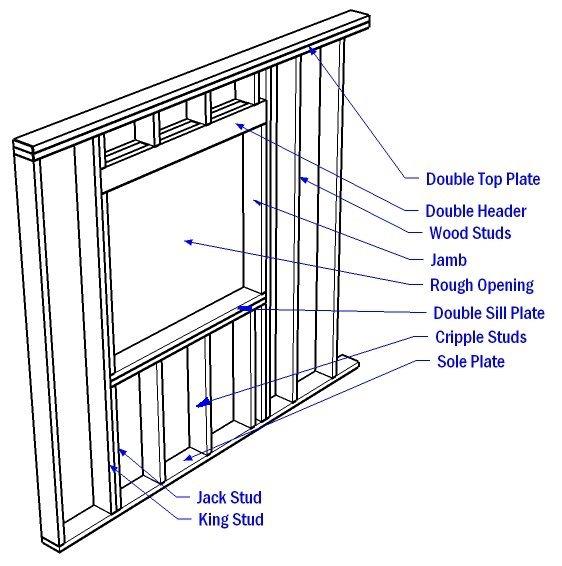
- Full-height 2×4 studs (or 2×6) to match your current wall depth. These will be used for king studs on either side of the window, cut for jack studs below the window, window sill and cripple studs.
- The header can be constructed of 2×8 or 2×10 beam.
- Exterior and interior window casing, shims and drip-cap flashing.
- Nails (16d), screws (3-inch), finishing nails, staples, plastic corner fasteners, fastening cleats, silicone caulking, adhesive-backed window membrane and felt paper/house wrap. Purchase a drop cloth, drywall or plaster, seam tape, joint compound, trowel, sandpaper and paint.
- Tape measure, level, stapler, hammer, handsaw, circular saw, reciprocating saw, caulking gun, stud finder, razor knife, carpenter’s square, drill with a screwdriver bit. Check your local tool rental centre to rent any tools you don’t own. It may be cost-effective to purchase some tools instead of renting them for the amount of time you’ll need them.
Step 3 – Measure and Re-measure
- Determine the area where you’d like the window to be installed. Each room will require different heights. Kitchen windows are usually placed above the backsplash (approximately 42 inches from the floor.) Windows added to the living room, dining room or bedroom can be placed as low as 12 inches from the floor or 36 inches to allow for furniture placement. However, for safety, a window lower than 24 inches in a child’s bedroom will require a window guard to prevent falls and any window lower than 18 inches from the floor will also require safety glass.
- A dinette window should be about 30 inches off the floor to match table height. Make sure the window is a minimum of 16 inches from the ceiling to make room for the structural header.
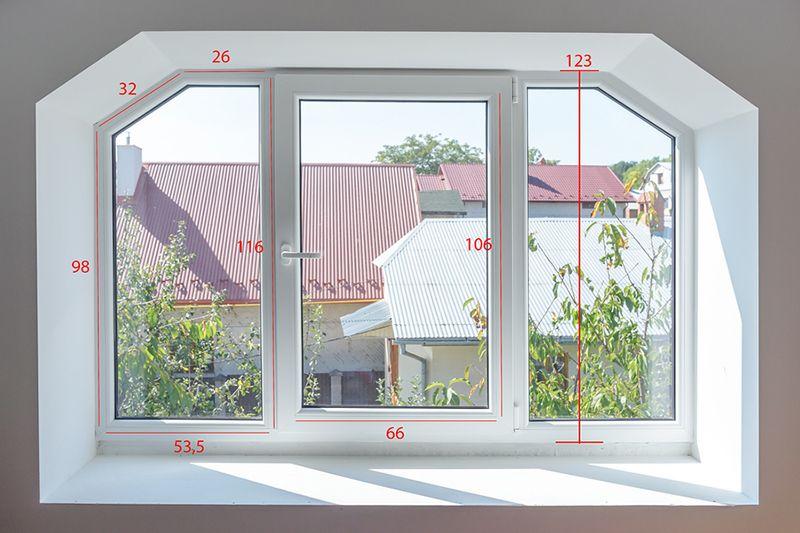
- Measure out the rough opening size for the window before you start cutting. This refers to the framed opening. The actual window will also include a top header, bottom sill plate and side vertical trimmers so will be slightly smaller than the rough opening. Take these measurements to accurately order the proper window size:
- Width along the top between the inside faces then reduce the measurement by 1/2 inch. This will provide room for paper flashing and adjustments.
- Width along the bottom between the inside faces
- Height of opening from the bottom of the header to the top of the sill. Add 1-inch to the bottom to allow room for the window sill. You should also take three measurements on the left, right and centre to reduce errors. Reduce this number by 5/8-inch to allow for paper flashing.
- Flashing thickness needed
- Order the window. It may take several weeks to arrive, so either wait until the window is delivered before cutting or plan on covering the opening until it arrives.
NOTE: If the new window is going to be more than 3-feet wide, you should consult with a professional window installer or engineer to be sure you have sufficient structural support.
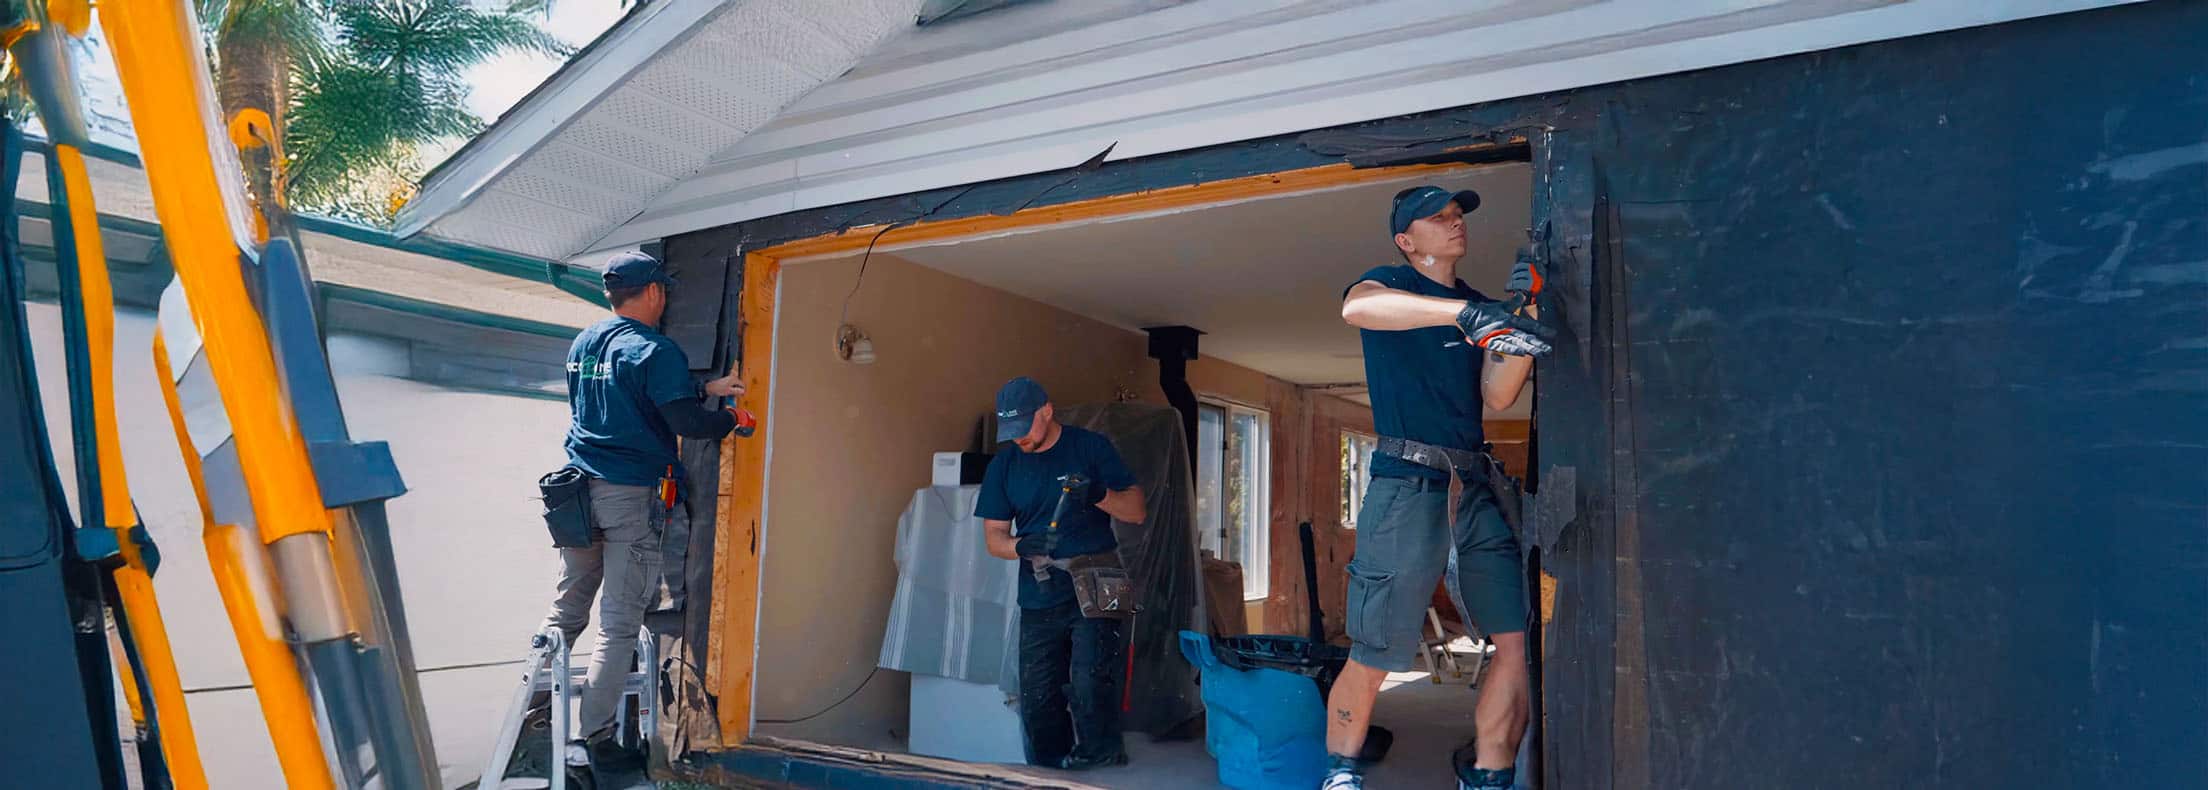
Step 4 – Cut the Opening
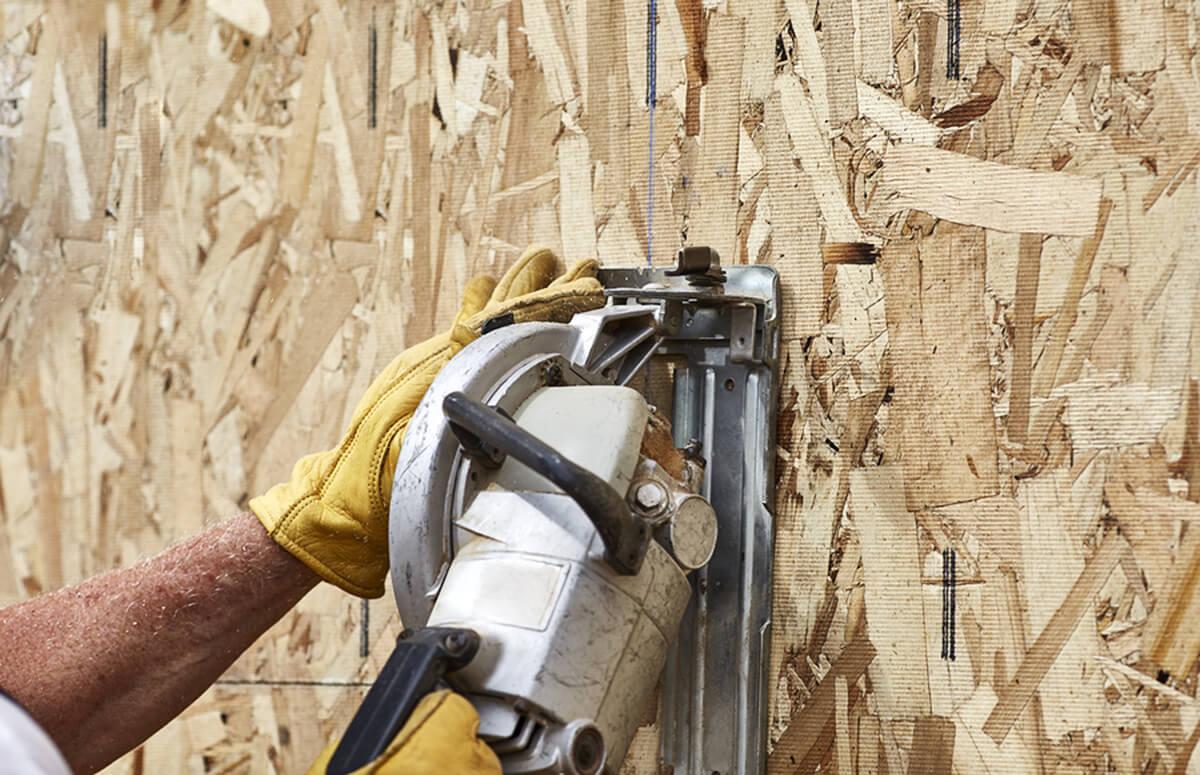
Now comes the scary part, actually cutting a hole in the side of your home. Once your new window arrives, you’re ready to start the process. Be sure you won’t be hitting any electrical, plumbing or HVAC. Plan on cutting the opening larger than the rough opening to accommodate the header and supporting frame. You’ll have more drywall repair work, but it will be easier than trying to squeeze the framing into the small opening.
Set aside an entire day to cut the opening, remove drywall and frame in the window. To reduce cleanup time, place drop cloths on the floor and seal off doorways. This process will produce a lot of dust and debris that you’ll want to keep restricted to the area you’re working, not the entire house.
- From inside the house, measure from the floor and ceiling and mark the dimensions on the wall. Draw all window measurements with a straight-edge ruler until you have a template for all sides.
- With a circular saw, follow the lines to cut out the drywall. Remove the drywall to expose the insulation and studs behind.
- Take a razor knife to cut through the insulation vapour barrier and remove.
- Cut and remove the studs in the window opening.
- Remove the top studs above the window, taking care not to damage the surrounding drywall.
- Wait to cut through the plywood and siding until after you’ve framed in the new window.
Step 5 – Frame the Window
By using the proper framing methods, you’ll be assured that your window will be structurally secure, won’t sag over time and will operate smoothly for years to come. So, how to frame a window opening?
- Add lower wall stud cripples below the window opening. These will support the window sill.
- Install the window sill at a slight 1-inch slope to allow water to drain. Make sure the window is level from side-to-side.
- Add a floating king stud to the right side (leave it loose for now to accommodate the header.) Attach a window trimmer.
- Add the window header with 2×4 cripples above. Use a level to mark the top and bottom of the header across the studs. Make cutlines 1/8-inch above and below the marked lines. You can either attach the header to the top plate or create a doubleheader out of 4x8s or 2x8s. Shim to fill any gaps as needed.
- Install metal angled brackets to connect the window sill to the trimmers.
- You can notch the studs around electrical wiring if needed or locate it behind the wiring.
Completing all these steps thoroughly ensures you are well prepared and know how to frame a window properly.
Step 6 – Finish Opening the Wall
With the framing in place, it’s time to cut the opening to the exterior:
- To locate the window opening from the exterior, you’ll need to drill pilot holes from the inside at each order. A 12-inch drill bit should be sufficient to drill through to the outside.
- Place a straightedge along the drill holes and draw a line to connect them. This is the area to cut out.
- Run a circular saw along the lines to cut out the opening. Remove the siding from the centre and use a reciprocating saw to cleanly cut out corners.
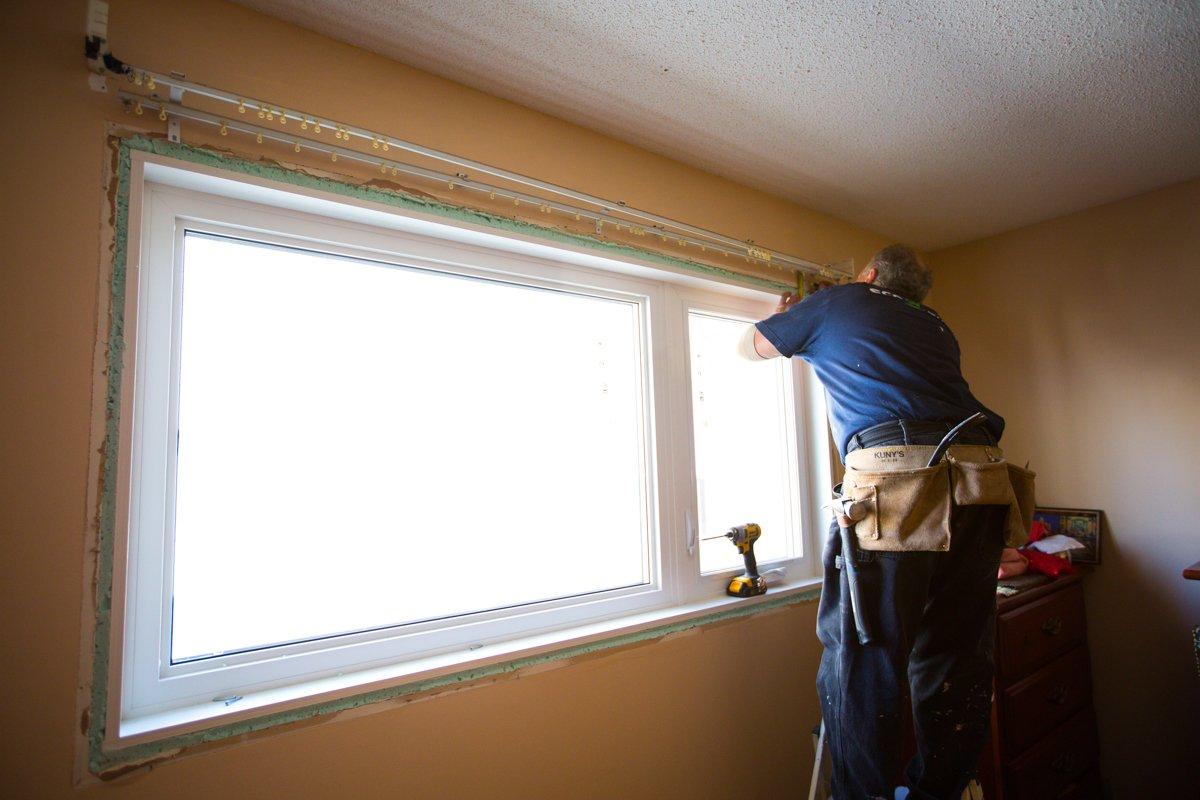
Step 7 – Place the Window
- If there is house wrap or felt paper already on the home, cut it back approximately 1-inch all the way around the window.
- Put a bead of caulk in the bottom corners, place plastic corner pieces on top of the caulking and staple in place. Make sure to cut the corner pieces to the proper depth of the window before affixing them in place.
- Use spray adhesive along the wood face around the entire window and the sill area. This will help the membrane seal tightly against the window frame.
- Cut adhesive-backed membrane approximately 6-inches longer than the window width. Peel away the backer and install flush along with the bottom window opening. Press onto the wood and smooth out. This helps to keep moisture from getting behind the window and rotting the wood. Add the next membrane piece, overlapping by 1-1/2-inches, and stack on top of the first membrane. Extend above the window opening, cut along the window opening and fold extra along the window sill.
- Run a bead of caulk 1/4-inch from the opening all around the frame. Don’t apply silicone along the bottom sill. This will allow water to drain.
- Set the window in place. Before nailing in place, have someone go inside to make sure the window is centred on the opening. Level the top and sides using shims as needed. There should be enough space around the window to add expanding foam insulation. This will help create a weatherproof seal. (Tip: Make sure you have the window facing the right direction.)
- Finish installing the window by nailing the flange all the way around.
- Add the window membrane to the sides. Be sure to overlap the flange to cover the nails. Add the last piece of the membrane along the top of the window. House wrap should go over top of the membrane. A heat gun will help seal the membrane tight.
- Cut new siding pieces to trim out the window. Attach them with galvanized nails to prevent rusting. Caulk along the edge of the siding and the window frame to create a vapour barrier and keep moisture out. Remember to leave some openings in the caulking along the bottom of the sill to allow any water to drain
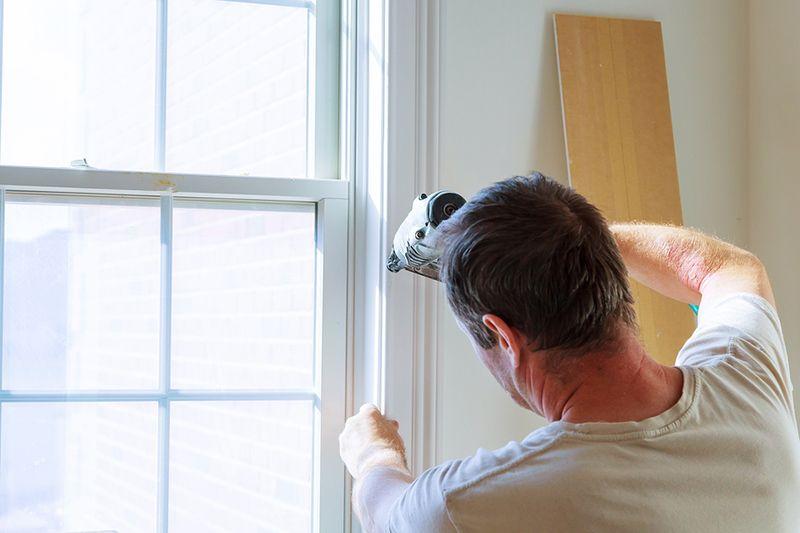
- Add finish trim to the interior of the window.
Conclusion
With the variety of different window styles available, it’s important to follow the manufacturer’s instructions when completing an installation. This guide is representative of the crucial steps required for adding a window to your house but may vary from product to product.
In all cases, it’s critical to provide proper structural support, make sure the window is level and square, and always do proper waterproofing. Be sure to follow local building codes, and contact Ecoline Windows any time you need expert advice or professional support.
Once your windows are ready for replacement, you’ll need to know the two types of installation methods available: Retrofit Installation and Full-Frame Window Replacement. The retrofit is recommended for newer windows without frame or moisture damage and only replaces the window sash. The existing frame is reused.
A full-frame installation uses a new frame, jambs, brickmoulds, and trim. This method is used when the surrounding wall structure has been compromised—often in older homes.
Whether you’re an experienced DIY-er or need a little extra help, the specialists at Ecoline Windows can guide you to the best window installation process for your needs.


1750 Coast Meridian Rd #102,
Port Coquitlam, BC V3C 6R8
100, 17866 106A Avenue,
Edmonton, AB, Canada,
T5S 1V3
3307 Dunmore Rd SE #12,
Medicine Hat, AB,
Canada, T1B 3R2
2081 Merivale Rd #201, Ottawa, ON, Canada, K2G 1G9
by appointment only
108, 55 Akerley Blvd, Dartmouth,
NS, Canada, ВЗВ 1M3