Vinyl Window Casing: Removal and Installation Guide [2024]
Built
in Canada
1. Get a FREE QUOTE and we will bring SAMPLES to your home.
2. We will call you back during WORKING DAY
3. We guarantee Direct Price and Warranty from Manufacturer
A significant advantage of modern vinyl windows is their ease of maintenance. Unlike wood, PVC doesn’t need to be scraped or repainted; it doesn’t darken, warp, or discolour with age, meaning your vinyl windows will look the same even 20 years after installation.
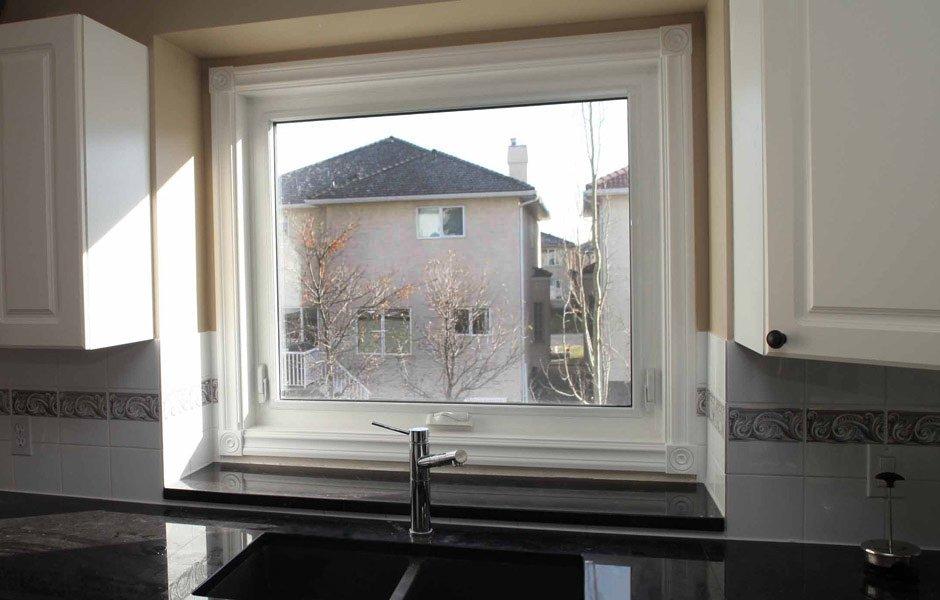
Another advantage of vinyl replacement windows is that these units create a seamless look on the inside of your home thanks to vinyl window trim.
However, if you need to repaint the walls inside your home, you may need to remove the casings from your windows to create a clean look. The good news is that the casing on replacement vinyl windows is designed for easy maintenance so you can remove it and put it back on in seconds.
The Ecoline team has prepared a video showcasing the best practices for removing and installing vinyl casing to keep your windows look terrific.
Here are some steps to follow to make sure you remove your vinyl window casing properly:
- Using a flat screwdriver or a chisel, find the edge where the interior window casing meets the wall. Slip the chisel in and make a small separation.
- Continuously separate the casing away from the wall down the whole length.
- Once there is enough separation, the casing around windows can be easily removed by hand.
Steps to consider when doing vinyl casing installation:
- Start by inserting one of the lengths into a corner piece.
- With the corner attached, find the beginning of the casing channel and gently push the edge into the groove.
- Line up the whole casing against the groove.
- With a hammer or mallet, lightly tap against the entire length of the window casing until it is flush against the wall.
- If window casing installation is done properly, there shouldn’t be anything visible past your casing.
Get a Free Consultation
Safety Precautions When Installing Window Casings: All You Need to Know
When handling window casing replacement or installation, safety should come first.
- Before diving into the job, clear the area around the window. This ensures you have ample space to work and minimizes the risk of tripping over obstacles.
- It is also advised to wear protective gloves when removing the exterior or interior window casing. This not only safeguards your hands from potential splinters or sharp edges but also ensures a firm grip.
- Always use the right tools for the job. A wrong tool can damage the window trim, leading to unnecessary expenses. When installing modern exterior window trim, make sure you follow the manufacturer’s guidelines.
Remember, the goal is to enhance your home’s beauty without compromising on safety.
Top Maintenance Tips to Have Your Vinyl Casings Keep the Original Look
In the window industry, vinyl window casings are known for their low maintenance and ideal look, lasting for years. However, even these units need a touch of care now and then. So here are some advanced tips to keep your vinyl casings look terrific:
- Regular cleaning ensures the window casing remains clean, enhancing the room’s aesthetics. A soft cloth, mild detergent, and water are all you need. Avoid abrasive tools that might scratch the surface.
- Inspect the window trim interior for any signs of wear or damage. Over time, even the sturdiest window trim might need a bit of upkeep. If you notice any issues, consider window trim repair or replacement to ensure longevity.
- While vinyl window casing is designed for durability, it’s wise to check the seals periodically. A compromised seal can affect insulation, leading to increased energy bills.
Final Say
Vinyl windows and casings have long proved to be the number one choice for durability and aesthetic appeal. Their low-maintenance nature and ease of handling make them a preferred choice for many Canadian homeowners.
And by following the right maintenance practices and ensuring safety during vinyl casing installation or replacement, homeowners can ensure their windows remain in prime condition for years.
If you need help with your windows replacement or retrofit, the Ecoline expert team is always here for you. Feel free to give us a call to get a free consultation on your project.
Get a Free Consultation
FAQ
How to remove window casing?
Use a flat screwdriver or chisel to find the edge where the casing meets the wall. Slip the tool in to create a small separation, then continue separating the casing from the wall. Once sufficiently detached, remove the casing by hand.
How to install window casing?
Begin by fitting the length of the casing into a corner piece. Once the corner is secure, locate the start of the casing channel and slide the casing edge into its groove. Align the casing with the groove throughout. Tap gently along the casing’s length using a mallet or hammer until it sits flush with the wall. A correctly installed window casing will show no protrusions beyond its edge.


